The normal human tendency is to praise and aspire for something that is not so easily accessible and overlook & ignore somethings that are right next to you. I strongly felt this when I was on a day tour last week to a place called Maddur.
Maddur is a town in Mandya district in the Indian state of Karnataka. It lies on the banks of the river Shimsha. A famous stop over place for people traveling from Bangalore to Mysore for Vada (a delicacy). For the recipe of the same, please click
here. Maddur is also famous for its 2 beautiful historic temples Sri UgraNarasimha Swamy Temple and the Sri Varadaraja Swamy Temple.HISTORY OF SRI UGRANARASIMHASWAMY TEMPLEIn the final days of Mahabharatha, Arjuna requested Lord Sri Krishna to give him a darshan of Lord Sri Narasimha. Lord Sri Krishna mentioned that this would not be possible as the Narasimha was a Ugra (angry) avatar. He requested Lord Brahma to craft a stone replica of Ugra Narasimha. This was installed in Maddur temple. In earlier days Maddur was called "Arjunapuri" as Arjuna worshipped in this temple. Later, Kadamba rishi worshipped here using the waters from a nearby river stream. The place was called "Kadambha nadhi kshetram" because of this. This place later became Maddur owing to kings using the place for making bombs for warfare. Maddu means bomb in Kannada. (text courtesy: Wikipedia)

Sri Varadaraja Swamy Temple
This temple was constructed by the King Vishnuvardhan. His mother was blind and Ramanuja requested him to take his mother to Kanchipuram Varadarajaswamy temple for curing her blindness. As she was very old for travel and Sri Varadaraja came in the dream of the king to construct one temple in Maddur itself. The king got sculpture craftsmen from Kanchipuram and created the idol of Sri Varadaraja. After the installation of the idol, a mandala pooja (48 days pooja) was done to the God. On the forty eighth day when the king's mother came to worship to the God her eye sight was restored. And henceforth the God got another name as "Nethra Narayanan". (text courtesy: Wikipedia)

“You can’t wait for inspiration, you have to go after it with a club.” — Jack London
I so truly believe this quote....and religiously follow it too.....
MY INSPIRATIONS FROM MADDUR.........
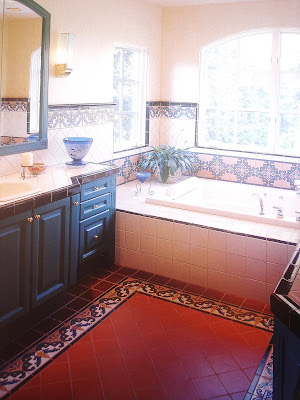
For a simple country decor, get inspired by this turquoise blue country house.

Loved the irregularly shaped, roughly textured stone pillars and the front sitting bank...

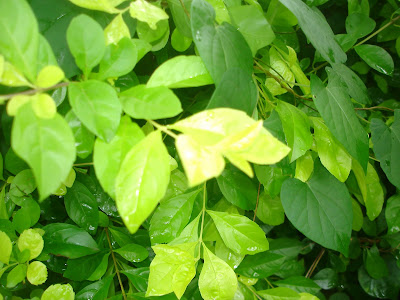
look at the display of colours and the lovely textures here. Imagine using them in your decor......

Observe the hues of yellow and the various proportions here.....

Do you also believe in this quote...............then do share your inspirations with me......


 Inspired by the same....I have created a diwali inspired decor for your living rooms. Please take a look...
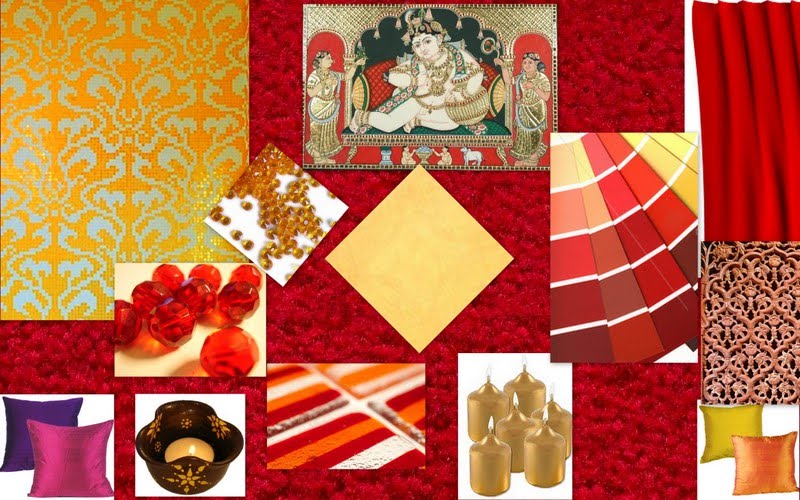 Clockwise from top left:


 Now to derive the colour palette from the above pictures.....


 Have a great day ahead!!!!!!!
 This is a simple picture of a terracotta duck against a grass background that I captured on my tour to Mangalore. If I had to pick out my colour palette from this picture.... then it would be.....


 Method: