Pages

Friday, 5 November 2010

Diwali Inspired Post.....

Hi Readers !!!!
WISH YOU A VERY VERY HAPPY DIWALI. MAY THIS DIWALI BRING IN LOADS AND LOADS OF HAPPINESS THROUGH HEALTH & WEALTH.
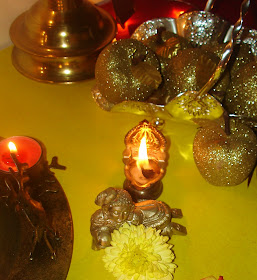
Here are a few pictures of diwali celebrations at my home.


Inspired by the same....I have created a diwali inspired decor for your living rooms. Please take a look...
Clockwise from top left:
"Gold Mosaic" from Bisazza, "Tanjore painting" from Tarang Gallery, "Red silk" brought from a local store can be stitched into drapes, "Carpet" from First impressions, " Wooden jaali or lattice" can be done by a skilled carpenter, "Silk cushions", "Striped glass tile" from rdwglass, "Handpainted diyas" from rural handicrafts, "Perlato gold tile" from marbonite, "Gold coloured candles" from crafted candles, "Vases" from asian design house, "Paints" from asian paints.

Thursday, 2 September 2010

Marquetry....or Wood inlay work....

On my recent trip to Mysore, I stopped by at a place called Srirangapatna. It had been years since I visited this old and famous temple. Although I had admired this town...this time more from a designer's perspective. Today, I would like to discuss about an artwork, that I have grownup seeing in most of the traditionaly decorated houses in Mysore and around. This artwork by the local artisans is called MARQUETRY. In simple words...we call it the wood inlay work. This is similiar to Marble inlay work. Traditionally, Mysore artisans were known to work with rose wood and ivory. Lovely rosewood doors with ivory inlay are still preserved at Mysore Palace and is a treat to the eyes. These doors have won many accolades at the international fairs all over the world. Today, rosewood and ivory are very expensive and so is subsituted by other compressed woods. The artisans have to spend hours of work to detail out a master piece with intricate patterns. Marquetry is the art of inlaying wood or ivory on another wooden surface to form a pattern. Generally, themes such as elephants, florals or a nature scene are typical of Mysore artisans. I spotted a few such pieces from a street artist here. Please take a look at them. Sleek bed side tables, center tables, art frames, coasters, Polster beds are an excellent choice for Marquetry.

Thursday, 26 August 2010

Monochromatic Scheme....

Hi Readers,
Back after a long hiatus and hope to stay inspired for sometime. I have loads of articles to update but have very less time these days. When I started this blog....little did I know that I would get so busy. Anyways, this is an interesting writeup about my favourite topic - "COLOUR". I want to share some info on the different colour schemes possible. To begin with...I want to talk about a simple yet complex colour scheme which is Monochromatic. "Mono" means one and "Chroma" means Colour. This scheme is all about handling a single colour in various tints...tones and shades. To make this more clear, let us take an example from nature. Please see this picture below, notice the variations in colour. A close observation will reveal the different tints, tones and shades of green. This is the best example to demonstrate a monochromatic scheme.


I created a collage of some of the green things I had at home. This exercise helps in understanding this scheme better.
Now to derive the colour palette from the above pictures..... (Photo Courtesy: click here)
Now for some examples of interiors in the same monochromatic green colour.

(Photo Courtesy: Click here)

(Photo courtesy: click here)
Hope you all enjoyed this post. Will post some interesting works of my students shortly.....

Wednesday, 2 June 2010

Colourful Tiling Ideas...

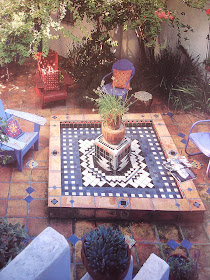
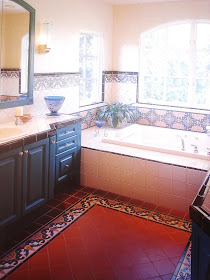
Sunset Books Inc. based in California have a series of books on interior designing. They have this series called "ideas for Great" which hosts a lovely collection of books ranging from different ways of Tiling, Wall systems, window treatments, Kitchens, home offices, patios etc., Their books are filled with lovely pictures, easy to understand and teaches the basics to any novice in this field. I cherish this book "ideas for Great TILE" and here are a few pictures of creative tiling from this book. ISBN 0-376-01677-9
Have a great day ahead!!!!!!!

Tuesday, 1 June 2010

How to choose your colour palette from something you have liked..

Hi Readers,
After reading the post on My inspirations from Maddur....many of you have written to me asking how to make use of the inspirations....the simplest answer to this is....you can choose the colour palette from something that has attracted your attention.
Assume that you have liked something ........it could be a landscape or simply a group of objects. If you have captured it on your camera....it means you have liked it. This post focuses on using your picture (any photograph of your choice) to derive your colour palette.

Please take a look at the following examples:

This is a simple picture of a terracotta duck against a grass background that I captured on my tour to Mangalore. If I had to pick out my colour palette from this picture.... then it would be.....Shades and tints of green and ofcourse terracotta brown. It is very important to note the proportions of the colour. How much of what colour is in the picture?. In this picture, the proportion of green colour is more than that of brown. Green is acting as a background colour. Keeping all this in mind, I have created this picture from my architectural software. Please do not mind the slight difference in the colours as the 3D image differs slightly fromt the intended colours.


From this picture, I derived the following colours: Black, Rust Brown and Majenta or Pink.


Since Pink in the picture is against a black background and is focal point of the picture, I decided to use this on my sofa and the carpet. If you have noticed the above picture...there is a tinge of rustic brown on the vessels...I decided to use this on my bookcase and the vase....you can ofcourse extend this to the door and window frames as well.
I hope you all liked this post. If you have any pictures and want my assistance in deriving a colour palette for the same....I would love to do it. Do query me about any info you need on this post.

Monday, 17 May 2010

My inspirations from Maddur

The normal human tendency is to praise and aspire for something that is not so easily accessible and overlook & ignore somethings that are right next to you. I strongly felt this when I was on a day tour last week to a place called Maddur. Maddur is a town in Mandya district in the Indian state of Karnataka. It lies on the banks of the river Shimsha. A famous stop over place for people traveling from Bangalore to Mysore for Vada (a delicacy). For the recipe of the same, please click here. Maddur is also famous for its 2 beautiful historic temples Sri UgraNarasimha Swamy Temple and the Sri Varadaraja Swamy Temple.

HISTORY OF SRI UGRANARASIMHASWAMY TEMPLE


In the final days of Mahabharatha, Arjuna requested Lord Sri Krishna to give him a darshan of Lord Sri Narasimha. Lord Sri Krishna mentioned that this would not be possible as the Narasimha was a Ugra (angry) avatar. He requested Lord Brahma to craft a stone replica of Ugra Narasimha. This was installed in Maddur temple. In earlier days Maddur was called "Arjunapuri" as Arjuna worshipped in this temple. Later, Kadamba rishi worshipped here using the waters from a nearby river stream. The place was called "Kadambha nadhi kshetram" because of this. This place later became Maddur owing to kings using the place for making bombs for warfare. Maddu means bomb in Kannada. (text courtesy: Wikipedia)


Sri Varadaraja Swamy Temple

This temple was constructed by the King Vishnuvardhan. His mother was blind and Ramanuja requested him to take his mother to Kanchipuram Varadarajaswamy temple for curing her blindness. As she was very old for travel and Sri Varadaraja came in the dream of the king to construct one temple in Maddur itself. The king got sculpture craftsmen from Kanchipuram and created the idol of Sri Varadaraja. After the installation of the idol, a mandala pooja (48 days pooja) was done to the God. On the forty eighth day when the king's mother came to worship to the God her eye sight was restored. And henceforth the God got another name as "Nethra Narayanan". (text courtesy: Wikipedia)


“You can’t wait for inspiration, you have to go after it with a club.”Jack London

I so truly believe this quote....and religiously follow it too.....

MY INSPIRATIONS FROM MADDUR.........

For a simple country decor, get inspired by this turquoise blue country house.


Loved the irregularly shaped, roughly textured stone pillars and the front sitting bank...look at the display of colours and the lovely textures here. Imagine using them in your decor......

Observe the hues of yellow and the various proportions here.....


Do you also believe in this quote...............then do share your inspirations with me......

Second panel of Decoupage for the terrace partition

Dear Readers,
Excuse me for the long absence from blogging. I had been extremely busy with work and I now have a lot of things to share with you. Continuing the theme of Radha Krishna decoupage which were in progress when i last left you. Here is a glimpse of the second panel. Just in case you have forgotten. These are asbestos panels on the terrace used as partition and for privacy. To make the terrace more interesting, we have decoupaged the panels. The theme is strictly followed.....therefore finding it difficult to source such big pictures of Radha Krishna for decoupage. To take a look at the previous post on this........please click here....

I hope you liked them......please send in your comments...

Wednesday, 14 April 2010

Using leftover Paints to create beautiful vases....

Thinking of what to do with all the left over paints in your containers. Then this is what you should do. Try this technique of using your last few drops of paint creatively. This is solely for non-artistic people.
Call this Modern or Contemporary art or an item of dramaticism..................
Things you will need:
  • a few flavoured milk bottles (Nandini milk bottles to be precise)
  • 1 round paint brush
  • Oil enamel paint- Base colour of your choice...(here it would be whichever colour is more in quantity)
  • Oil enamel paint- a few droplets of all the leftover paints
  • a litre of water
  • a waste cloth
  • 20 mins of your time.
Method:
  1. Clean the bottles and wipe them dry.
  2. Apply a base coat (oil enamel) in any colour of your choice.
  3. Ensure that you either apply the paint to the bottom half or top half of the bottle for two reasons. One, it looks nice to create a pattern with bottles if you have many. Two, If you paint the whole bottle, you may end up leaving finger prints. If you still want to paint the complete bottle, ensure that you do the top half first and then do the bottom half.
  4. Now take a large bowl of water, add a few drops of different colours of paint. Do not worry about being precise...remember, i already mentioned that this needs no skills of art.
  5. Use a toothpick to stir the paint in order to create random patterns. To give some punch to this lets call this retro pattern.
  6. Without wasting any time, you have to dip the painted portion of the bottle into this water carefully without stirring the water. Slowly immerse the bottle once and take it out. Do not repeat this step.
  7. Allow the bottle to dry.

VOILA !!!!!!!!!!!!!!!!your vases are ready and it takes only a few minutes..........LITERALLY!!!!

Please write to me if you have any queries before doing this.